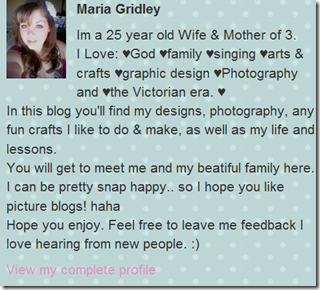
“who could this be?” You ask
Maria from Agape Designs. She went above and beyond to help me out. About Maria:

How did she help me out so much??
She wrote me a whole entire tutorial to show me how to do it. She didn’t have to do that. She didn’t have to go out of her way to help me. So I thank her so much (VERY VERY much) I love blogging because I love meeting awesome people that make life so much more amazing by being a true friend, helping out as much as she can.
So Maria- I ♥ you for being awesome and you have a permanent place on my blog..
Here is the tutorial she wrote:
Paint.Net Layers Tutorial for Jess :)
Hey Jess, hope this helps... I did lots of pictures.. cause thats easiest for me to explain! :) I decided to just do a tutorial while make you a siggy.. you will find that at the bottom of the page. Pixel credit goes to Ashley at Reverie Pixels. :)Once you open up paint.net a blank image will appear.. you will most likely want to resize it to fit what ever it is you want to create. :)
This form will pop up and you can change the size.. you can unclick "maintain aspect ratio" if you want different size or shape.
Moving on to layers:
Pick a font :)
To work in a specific layer.. click on and high lite that layer in the layer box. What ever you do/change will be applied to the blue high lighted layer.
To add something to you image.. simply click FILE in the menu bar, then OPEN and pick what you want to be working with. I opened up a pixel tube. It will open up as its own image, separate from the one you're working on. To add it into the image you're working on DO THE FOLLOWING:
After the image is selected:
You can move the 2 images around to fit it how you desire.. working in separate layers. As you can see layer 3, the image with the pixel tube is selected/high lighted, so I can move that around. If I want to move the writing around.. I would click on layer 2 in the layers box, so I could work on the "made by jess" layer.
Here I added in some mushrooms the same way I added in the pixel girl, in its own separate layer.
I want to cut away the excess area around the siggy, so i select it to fit. (I forgot to show it, but the rectangle select button is next to the point selector in the tools box)
If you think you may want to re design this in the future or make any changes, without having to re-make one.. you would click file, then save as.. and keep it saved as a pdn file.. that way it keeps the layers separate and yu can open it up in paint.net and still make changes. If you are completely done with it and dont think you will make changes then do the following:
And there you have it.. your finished product! :) I hope you like it... I am sure you know how to save this to your computer right? :) I really hope this helped you. You just said you needed help with layers.. so i wasnt sure exactly what you knew and didnt know.. so just went through it all. LOL If you still need help.. or if I missed anything.. dont be afraid to ask! :)
~Maria Isabel


I have been wondering the same exact thing- so Thank you Jess and Maria!!! Can't wait to try it and finally get around to making a design for my blog name!!!
ReplyDeleteThank you so much for this layering tutorial. I was all over the net last night looking for help as I want to change the header on my Niagara Falls website.
ReplyDeleteAll the tutorials available (even youtube videos) were terrible. I was getting so stressed I wasn't having fun with it!
There are too many people sharing information that don't know how to teach. This has been a real blessing. I have posted your blog url to a favorite forum of mine in order to help others. Thanks again.
Linda Pepin
http://www.whyniagara.com